


A Proven Approach for Veneer Cementation
 Blog
Blog
When it comes to veneers, many will agree that the cementation process is the scariest part. You’ve put all this time and effort into getting to this point. You’ve done the treatment planning and the smile design. You’ve gotten your patient to approve things. You’ve done the prep. The veneers are made. Now you have to get it across the finish line…in a way that will avoid problems and re-dos.
There’s a lot of room for error here, so how can you ease the pressure?
According to Dr. Todd Snyder, a cosmetic dentist and
international author, lecturer and consultant, the answer is to get a
simplified system that works for you.
Consider how many teeth are involved
Dr. Snyder has two systems. Which one he implements depends on how many teeth are involved.
“If it’s six or eight teeth and I can have good isolation,” Dr. Snyder shares, “I’ll put them all in at once. Me personally, I find that if I try to put in one at a time, I have more potential risk in front of me than if I’m putting multiples in at the same time. And so my management process is to try and get everything in at the same time if I have good isolation and control of the area.”
If it’s a lot of
teeth, he will break it up into two or three sections, and then put all of the
veneers in each section in at once.
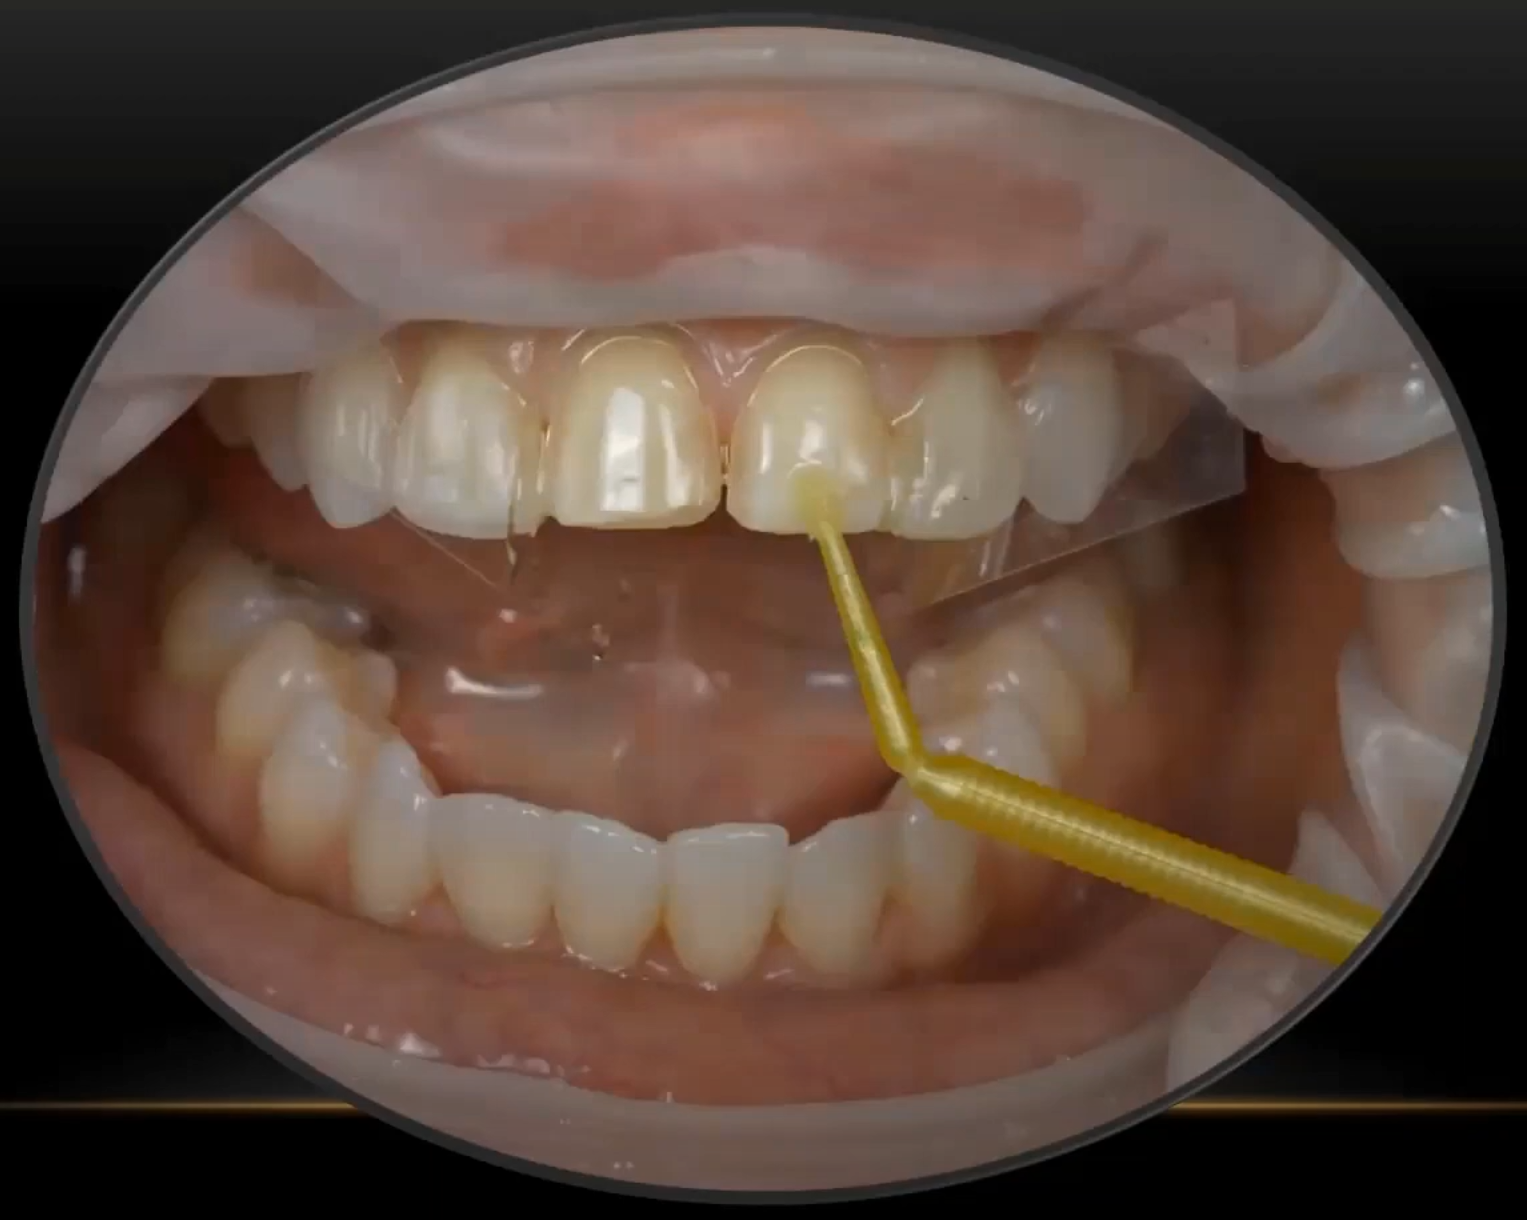
Start by checking each veneer individually
Of course, you don’t
start by jumping right into cementation. Before moving forward, you need to
remove all the temporaries and clean the teeth. Then try each veneer
individually with no try-in paste, to carefully check the margins and
interproximal contacts. Once you’ve confirmed that everything fits, then it’s
time to start implementing your veneer cementation system.
Putting many veneers in at once
What does it mean to
put all the veneers (or all the veneers in a given section) in at once? Here is
the process that Dr. Snyder recommends…
· Etch all of the teeth at once (if you are total
etching).
· Apply the bonding agent on all of the teeth at
once.
· Air thin and cure all of the teeth at once.
· Fill all of your veneers with a try-in paste,
and then seat all of them one after the other, in one go.
· Sit the patient up and give them a mirror so
they can approve the color, appearance, shape, etc.
· Once you have approval, thoroughly clean the
veneers with either an ultrasonic water bath that has an alcohol in it or a
steam bath, to ensure they are free of contaminants.
· Apply your silane to all of the veneers and then
put a little warm air over it to allow that to evaporate.
· Load up each of the veneers with your luting
cement and place them on the teeth (once again, one after the other, in one go).
The products you choose have a big impact on this process
For this approach to be successful you need to carefully consider which bond and cement products you will use.
For the bonding agent Dr. Snyder favors BISCO All-Bond Universal. This product, he says, “has a thin film thickness when used properly, such that it won’t interfere or impact my veneer seating to completion. Obviously, if you have a thicker film thickness from a different brand or manufactured product, if you don’t thin it properly, then things will not seat and you probably shouldn’t be curing that.”
Dr. Snyder also uses BISCO Choice™ 2 Veneer Cement. “The resin luting system that BISCO has created is phenomenal,” he notes, “in that you have a try-in paste that’s water soluble. This allows you to try in all the veneers at the same time, so the patient can see the optical qualities of everything. By using a water soluble try-in paste that doesn’t leach out [like water does], you maintain an optical coherence of the tooth and the veneer so the patient can see the color qualities and approve that before you cement things. This ability to have a try-in paste that mirrors the final resin luting cement is critical for your success.”
Which color Choice™ 2
cement should you use? Dr. Snyder uses translucent for nearly all cases, but
chooses milky white on those that need a little extra “pop.”
What to look for when choosing your bonding products
The two biggest considerations are film thickness and color stability.
“If a bonding agent has a thick film thickness,” Dr. Snyder asserts, “it doesn’t matter how much you air thin it. It’s going to be too thick and your veneer will not seat properly. Your margins will be open.”
Understanding the film thickness is therefore key. If it’s a thin film thickness, like BISCO’s All-Bond Universal, you can light cure it. If it’s thick you do not want to cure that, so you’ll be sandwiching everything together and curing it all at once – which is less desirable.
“The advantage of curing a bonding agent ahead of time,” explains Dr. Snyder, “is that it’s already on the tooth as opposed to if you’re curing through a veneer and curing through your resin luting cement to get to your bonding agent. Everything is curing towards its mass or where the chemical reaction started. That means you’re pulling things to some extent away from the tooth. So you might not get as good adhesion to the tooth structure if you’re trying to cure everything all at once as opposed to curing the bonding agent on the tooth.”
For color stability, he continues, “BISCO Choice™ 2 Veneer Cement is phenomenal in that the Delta E value, in other words, the color perception of a color shift, is not visible. It’s not perceivable to the human eye.”
Then, by using the
translucent option, the color is all achieved in the porcelain of the veneer,
which has excellent long-term color stability.
Conclusion
This proven approach,
combined with the right products, can go a long ways towards easing the
pressure when you need to place veneers.