




| Dental Podcast Episode - The Dr. Phil Klein Dental Podcast | Listen on: |

|

|

|

|
and others. |
Episode 793: Mastering Porcelain Veneers: From Digital Wax-Up to Post-Insertion Visit
 |
What separates a veneer case that runs smoothly from one that falls apart at cementation — and how do the most experienced clinicians consistently deliver stunning results? This episode breaks down every phase of the porcelain veneer workflow with the kind of clinical specificity that only comes from decades of real-world practice.
Dr. Gary Radz is a cosmetic dentist based in Denver, Colorado, where he has practiced for more than 30 years at The Colorado Center for Cosmetic Dentistry. A graduate of both AEGD and GPR residency programs, he has served as an associate instructor at four different postgraduate educational institutions and currently holds a visiting faculty appointment at the University of Colorado School of Dentistry. Dr. Radz serves on the editorial boards of six professional journals, including the Journal of Cosmetic Dentistry, and is president of Snow Mountain Seminars, a dental consulting and educational development company.
In this episode, Dr. Radz walks through his complete, time-tested veneer workflow — from diagnostic wax-up and provisionalization to try-in protocols, cement selection, bonding technique, and post-insertion follow-up. He explains why transparent resin cement is preferred over shade-altering options, why light-cured cements outperform dual-cure systems for thin restorations, and how patient sign-off at the try-in stage protects both the clinician and the outcome. The conversation is grounded in clinical rationale and directly applicable to everyday practice.
- The diagnostic wax-up serves as a three-way communication bridge between the patient, clinician, and ceramist. It allows the clinician to translate patient expectations into a tangible preview that can be revised before preparation — and to demonstrate to the patient what is and is not clinically achievable given their existing occlusion and anatomy.
- Reliable provisional veneers can be created in approximately 20 minutes using a putty matrix relined with light-body impression material, loaded with a bis-acryl provisional material, and spot-etched at the center of each prepared tooth. Keeping provisionals connected as a single unit rather than as individual restorations significantly improves retention throughout the provisionalization period.
- Transparent try-in paste should always be the starting point during the try-in appointment, as it allows the natural depth and translucency of the porcelain to be evaluated without interference from cement shade. If value adjustment is needed, alternative shades of try-in paste can be trialed, and the final cement shade should match the approved try-in paste exactly — with the same shade available in the cement system used for delivery.
- Lithium disilicate remains the material of choice for porcelain veneers over zirconia due to superior translucency, depth of color, and a well-established bonding profile. During cementation, the intaglio surface should be cleaned with an appropriate ceramic cleaning agent after try-in to remove oral contamination, followed by re-silanation, even if the restoration was silanated at the laboratory.
- The post-insertion appointment at one to two weeks is a non-negotiable part of the veneer protocol, focused primarily on occlusal refinement and removal of any residual cement. Patients evaluated immediately after delivery are often numb, fatigued, and unable to accurately report occlusal interferences — making a dedicated follow-up visit essential for identifying lateral excursive contacts, papillary inflammation, and any cement remnants causing floss shredding or gingival bleeding.
Perfect for: General dentists looking to systematize their veneer workflow, cosmetic dentistry enthusiasts at any stage of their career, dental residents building foundational skills in esthetic restorations, and any clinician who wants to reduce chairside stress and improve long-term veneer outcomes.
If predictable, beautiful veneers are a goal in your practice, this is the episode to listen to before your next case.
Disclaimer
Viva Learning LLC sites offer content that include opinions, techniques, recommendations, etc. from a variety of writers and speakers that are not necessarily endorsed by Viva Learning LLC, its associates and sponsored Viva Affiliates. Viewers are responsible for verifying the validity, accuracy and relevance of all content before implementing any techniques, products or recommendations into their clinical setting. Viewers understand that Viva Learning LLC, its associates, writers, speakers and sponsored Viva Affiliates are not in any way responsible or liable for any adverse events that may occur (i.e., in a clinical setting or anywhere) based on any information disseminated from Viva Learning LLC sites, including all Viva Learning sites.
The copyrights and other rights to the slides and video contained in a webinar posted on this website are owned by the speaker, Viva Learning LLC, and/or the sponsor company and/or its subsidiaries worldwide. Viewers are only authorized to view the content of the webinar (live and archive) at this Website and are not permitted to screen capture, record and/or download any content displayed in this webinar. You may not make any part of this Website available as part of another web site whether by hyperlink framing on the Internet or otherwise.
The copyrights and other rights to the audio contained in a Viva Podcast are owned by Viva Learning LLC. Viewers are authorized to listen to the content of the podcast and are permitted to download any podcast for personal use only. You may not, however, make any part of this Website available as part of another web site whether by hyperlink framing on the Internet or otherwise.
By signing up for a free webinar and/or podcast you give Viva Learning LLC and/or its Viva Learning Affiliates permission to send you emails alerting you to future CE opportunities and e-learning content.
California State Dental Board Provider Statement
Viva Learning is a registered continuing education provider in the state of CA. Dental Board of CA Provider #RP 5747. Approved through 6/30/2026
Questions regarding our Conditions of Usage, Privacy Policy, or other policy related material can be directed to our support staff by clicking on the "Support" link or you can email us at: support@vivalearning.com.
Approval does not imply acceptance by any regulatory authority or AGD endorsement.
Approval period: 11/1/2025 - 10/31/2029. AGD Provider # 217544
Presenter Information: Dr. Gary Radz
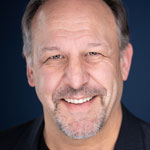 |
Dr. Gary M. Radz practices in Denver, Colorado. His practice, The Colorado Center for Cosmetic Dentistry, focuses on esthetic/cosmetic dentistry. Dr. Radz is a graduate of both AEGD and GPR residency programs. He has served as an associate instructor for 4 different postgraduate educational institutions and is currently a visiting faculty member at the University of Colorado School of Dentistry. He serves as an editorial board member for 6 different professional journals, including the Journal of Cosmetic Dentistry. Dr. Radz is president of Snow Mountain Seminars, a dental consulting and educational development company. |
Viva Learning is an approved AGD PACE Provider and California State Dental Board Provider of dental continuing education. Viva Learning strives to deliver balanced, objective and clinically relevant information grounded on scientific research. Lecturers who are invited to deliver Viva CE webinars are advised to substantiate their claims with research-supported data and to disclose all commitments to, or relationships with, any commercial entity within the dental industry. In many cases, lecturers are sponsored by a dental manufacturing company, which provides them with support in the form of honorarium and/or dental products and equipment in order to help with clinical presentations. Prior to each live CE webinar, lecturers are made aware of the importance of delivering their presentations without commercial bias, and where appropriate, to mention a variety of different product choices that may be relevant to the subject matter of the lecture, for the educational benefit of the participant.
Transcript
me to sit the patient up, hand them a mirror. I warn them they have to be careful because they can
knock these off, but it gives them a chance to look at those in place because I'm not going to put
them in until they tell me they love them. Do they sign off on these things? Like literally sign
off? Every time. Every single time.
Welcome to Austin, Texas, and welcome to the Dr. Phil Klein Dental Podcast. What does it really take to
create porcelain veneers that look stunning, fit perfectly, and last for years?
Why do some veneer cases feel effortless while others become stressful before the final cementation
appointment? And with so many bonding systems, cements, and digital workflows available, how do you
separate the techniques that truly matter from all the noise? Joining us today is Dr. Gary Radz,
a nationally recognized clinician, educator, and speaker who has been helping dentists master
aesthetic dentistry for decades while practicing in Denver, Colorado for more than 30 years.
In this episode, he shares his proven workflow for creating predictable, highly aesthetic porcelain
veneers from diagnostic wax-ups and lifelike temporaries to try-in protocols,
isolation, bonding, and cement selection. that removes the guesswork from veneer delivery.
Dr. Radz also explains why the case isn't over once the veneers are seated. He discusses the
importance of the post-insertion visit, where he carefully re-evaluates the occlusion and checks
for any remaining excess cement that may need to be removed, small details that can make a big
difference in long-term success and patient satisfaction. So if you want more confidence with your
next veneer case, you won't want to miss this conversation. Before we get started,
I'd like to thank all of you for tuning in. If you're enjoying the show, please follow us on Apple
Podcasts and Spotify, and even better, leave a review. By doing so, you're not only showing support
for what we do here, but your reviews are instrumental in getting more dental professionals to
listen and benefit from our content. We really do appreciate it. Dr. Radz, welcome to the show.
Thank you very much. Good to see you. Yeah, good to see you again. We've known each other for
decades. Too long sometimes to admit how long we've been in this profession. But it's been a great
ride, and we've still got lots of gas in the tank. And based on your last webinar that you did that
I want to bring attention to before we get into the program, Dr. Radz did an excellent presentation.
It was delivered on May 21st, 2026, which is about three months ago. It's called Veneers,
Beautiful Temporaries and Efficient Cementation. So it was really well presented, covering so many
aspects of technique and materials about veneers. With decades of experience,
you can access the webinar on VivaLearning.com. Just type in Dr.
Radz’ last name, R-A-D-Z, and you will see the webinar. I highly recommend it.
Don't you wish, Dr. Radz, that when you were 25 years old, you could just click on a webinar and
somebody's going to show you how to do a veneer that has 30 years of experience? That would have
been wonderful. Yeah. We didn't have that luxury. I mean, when you think about it, people come onto
a website and click a webinar and then they watch your slides and they don't have to leave their
house or leave their office. Just imagine what we had. Back then, we had to have a mentor,
right? We had to have somebody that we could go to and watch them over the shoulder. Yeah, and
you'd spend money on plane tickets and hotels and lots of money on sea courses.
Yeah, yeah. But you got there anyway. You still got the knowledge and expertise that you wanted,
so you did it. But it's just a little bit easier today. A little bit easier today, without a doubt.
Yeah, I hear you. So I think a good way to begin this discussion, Dr. Radz, is with the diagnostic
wax up. That is the first stage of doing veneers, which is the topic of today's episode.
How does the diagnostic wax up contribute to predictable veneer outcomes?
And why is it such an important communication tool for both the patient and the laboratory? Yeah,
so what the diagnostic wax up is, It's my interpretation of,
one, what the patient's telling me they're looking for. So the initial consultation,
talking to the patient, what are you looking for? What are you looking to improve? Describe to me
better what you think an ideal smile would look like on you.
And I take that information that the patient presents, and then you look at the clinical situation,
and it's like, okay, to... their expectations. What do I need to do to get there?
And then I have to take my interpretation of the patient's expectations,
translate that to my ceramist, and they're going to interpret my interpretation of the patient.
The wax of what that'll do is the ceramist will say, okay, I understand what you want. This is what
I'll be able to deliver. And that's where it becomes a communication tool with the patient.
Because I want the wax up, I want to be able to present that to the patient and say,
okay, based on what you told me you want, this is what I can create. And what are you actually
showing them? Are you showing them a model? Or I know in the analog days, you showed them a wax up,
right? Yeah. But today, you could show it to them on the screen if they get you that STL file back
right away or do it yourself in-house on a design software. I don't know how you do it, but...
You should be able to show them visually what it's going to look like pretty quickly, right?
Without a model. Yeah, we can do it without a model. And maybe it's just me showing my age.
I like them to be in the office sitting with me. I think holding in your hands, turning it in three
dimensions. I have done it by a Zoom call with a few patients.
Typically, those are patients that are coming from long distances. But my preference is still have
them sit with me in the operatory, give me their feedback. Even on a digital model,
I can make changes physically. Just pick up a handpiece and I can make some changes based on what
their critique is. The importance of the wax up is that communication with the patient and show
them what you can do. Sometimes there's things we can't do that they want to have done so I can
prove it to them. By showing the model, it's like you want this done, but you're in crossbite,
so I can't do this or whatever the situation may be. Is it done in an articulator or just free
models in your hand? No, just... Free models. Yeah. So what do you have to send the lab as far as
acquisition data for them to create a pre-op digital wax up? Yeah,
that feel has never changed. Okay, it's the impression. This time it's scanned instead of an analog
impression. But I send them the impression, the bite registration, that's scanned in. Photographs
of the patients. I still use the AACD protocol of the 13 different views.
That's what my ceramics is used to as well. So pictures, model or impressions digitally.
And then the written. prescription or a phone call, again,
where I'm translating what the patient's expectations are along with what my requirements are.
So that really hasn't changed in 30 years. Some are now.
I don't do it, but I do have many of my contemporaries that are sending videos. know,
showing the patient's speech and the lip dynamics and stuff like that.
What about facial scans? Is that something that you are doing? No, but I'm interested in it.
It's fascinating stuff.
amazing thing, which, which allows, I mean, that may not be that necessary for the social six or
social four veneers necessarily, but maybe, I mean, if you're looking for it.
Yeah. With the more complex cases, I think that that's an incredible tool to have. Yeah.
Yeah. That's, I saw that in action. The jaw tracking, it was crazy with, with putting those labels
on the, or those stickers on the teeth and then having the patient move back and forth and it
tracks it. I mean, this technology has been around a while. but it's now getting into dentistry.
Let me ask you about provisionals. For some reason, many dentists find provisionalization to be one
of the more stressful parts of veneer treatment, you know, because this is a very aesthetically
driven endeavor that we're doing here. Can you walk us through your technique for creating
consistent, predictable, temporary veneers that accurately preview the final result?
Yeah, my technique hasn't changed in probably 20 years. When I did the webinar, I titled it
Predictable because it is just so darn predictable. It's based on the wax up.
So I've already met with the patient. We've reviewed the wax up. That's what they're expecting to
see. So with the wax up, we'll make a putty matrix off of the wax up.
And then once the teeth are prepared, all the information is gathered for the lab. The last thing
we do is do the temporaries. What I'll do is I spot etch the prepared teeth.
I don't etch the whole tooth. That'll attach temporary too well. Okay,
just dead center of the tooth. I'm just going to put a spot etch. I let it sit there 20, 30
seconds, rinse, dry. And then I'm going to load the putty matrix the way I would for a temporary
crown. No different. I'm going to load that temporary matrix with the appropriate color of
luxatemps what I use for. ever, with the appropriate shade,
load that up, seat it to place. You also do a reline using a light body impression material into
the putty. Is that correct? Yeah, you're paying too much attention. Yeah, too many details there.
Well, that gives it a little bit more accuracy. So when you take the putty matrix and then you
reline it with the light body, now you've pulled it off the model and you have this perfect tray to
deliver this luxatemp, whatever you use. And you put a little bit of material in there, right?
Because it has to be very thin. Yeah. There's not much room between the prepared tooth structure
because you're doing fairly conservative, in I guess most cases, veneers, right?
Yeah, good point. I'm going to load it actually pretty full. I get what you're saying,
Phil, but I'm going to load it pretty full. To your point, when I put that putty matrix in with the
temporary material, I put it in and I'm keeping firm pressure on there because I know I'm going to
extrude a bunch of excess. But what I don't want to do if I try to be too precise and don't use
enough material, now when you pull it out, you've got voids. Now, what's the etch?
And what is the etch actually doing? Because the material, you're not using any adhesive bonding
agent. So the etch is just roughening up the enamel enough to give it mechanical retention to the
temporary material? Yeah. Yeah, because think about this, Phil. When we were taught to do sealants,
you etch the tooth and then you put a composite resin on the tooth, the sealant. You didn't put a
bonding agent. Right. Maybe they teach it that way now, but the way I was taught, you etched and
then put the composite. Same thing. So you etched the tooth. You're going to create a little bit of
roughness right there, but there's enough mechanical retention of that little bit of edge to hold
the composite resin to the tooth. If you put bonding agent on there, you're not going to get the
temporaries off or you don't get all the temporary material off. Now you go to seat your veneer. It
doesn't fully seat. And you can't tell why because the temporary material blends in with the tooth.
Right. It's shaded. Exactly. Now you let that sit for about five minutes. Five minutes. Five
minutes. So that's fully cured now. Yep. And then when you remove the matrix,
you're looking at a temporary that's got some extra flash on it and stuff, but you don't even have
it so that the patient could floss in between there. So explain that. Yeah, that's where I gain my
retention. If you do individual veneer temporaries, they're going to pop off.
But if you keep them connected together, you gain more retention because they're wrapping around
and you're grabbing a hold of the tooth.
And they're not going to be able to floss. And I tell them they're not going to be able to floss.
And they don't like it. And I wish they could, but they can't. But if you meticulously trim up your
temporary material and pay attention, When you're going in approximately, because I clear off the
papilla area, you know, I get in there with a fine carbide burr to finish that out.
I use the number 12 blade scalpel burr to even carve that out. And I'm not done in the papilla area
until I can take my Explorer and I can go facial to lingual. I guess you use a proxy brush. Proxy
brush or a floss threader. Floss threader, yeah. So you can hand them a Ziploc bag of those things
on the way out the door. Yeah, and then you hope they actually listen to you and do it. So it must
look beautiful. I mean, I saw some of the pictures. They walk out with a temporary or a provisional
that actually didn't take you that long to do, right? Because everything's all set up.
What are you talking about chairside time to create? 20 minutes. Okay, 20 minutes for what? A sixth
veneer provisional? Yeah. 20 minutes, and they're out the door. And usually two weeks until that
veneer comes back. Yep. All right. So let's talk about the try-in appointment. That is kind of the
last opportunity to catch problems before cementation. So what are the critical steps you follow
during the try-in stage to evaluate fit, aesthetics, occlusion, and patient acceptance?
Yeah. So the try-in appointment, first thing is getting the temporaries off.
You got to get those off. You have to make sure the prepared tooth is clean.
What do you use to take them off? Usually just a sickle scaler. You get it in underneath the
papilla and you just pop it and it'll fly across the room.
And hopefully you'll never need it again, right? Once it flies across the room, you hope you'll
never need it. You're done with that. We'll make a new one. Right. Yeah.
So you remove all temporaries. You clean the prepared tooth.
I've got set up in my operatory so I can, I've got a little chair side sandblaster and I'll gently
sandblast the tooth to make sure I've got rid of all the temporary material. And then the next step
before you actually try on the veneers, there's going to be some places where the tissue is
irritated. So using multiple or any sort of different type of hemostatic technique,
we need to control any bleeding that's happening. Is cord okay using hemostatic cord?
No. Yeah, good point. Pretty sure I made it in the webinar.
If you try putting cord in there, more than likely you're going to irritate the tissue more. So I
avoid that at all costs. Hemostatic solution that's a luminous based,
like the viscostat clear or the retraction paste that we have nowadays.
Those are really good. Traxedent is one of them from Premier. Yeah. Yes. Yeah.
I'm going to control the hemorrhage that way. On rare occasions, sometimes I have to get on my
diode laser and I actually have to spot coagulate with the laser. Now, if you see a patient that
comes back. and they were not compliant with home care using that floss threader or proxy brush,
even though you made the interproximal space for them to do the best job they can,
and you're touching that thing and it's oozing blood, you're going to send that patient home, I
assume. There's been a few occasions, fortunately very limited, that we've had to do that.
Yeah, and I've had a couple. You try to avoid them at all costs. But I think the patient
instruction and education you give them before they leave with that provisional, I think most of
them are going to be pretty, I mean, they're paying a lot of money for this. They want this thing
to work. So I guess overall, you shouldn't have much of an issue with that. So on the try-in,
once you have the teeth clean, let's talk about the try-in paste fitting or evaluating whether
that veneer fits. Yeah. Once everything's cleaned up, the soft tissue is under control.
Now you're going to try on the veneers. I like using a try and paste. Try and paste are normally
included in a lot of the light cured resin cements. I use the Choice 2 system from Bisco.
Why do you like that system? Ease of use, predictability, color stability, and the flow
characteristics. The combination of all those just make it a really nice material.
That system includes the cement? Yes. So basically everything you need is in there.
Yeah. Yeah. To the etch and the bonding agent and all that too.
So I'm going to use the try and paste. One, because it will simulate the color of the cement.
And two. It creates a little bit of adhesion to the tooth. So load the veneer,
set it on the tooth, do all six, eight, ten of them, get them all into place, clean up the excess
try and paste. Now I'm evaluating marginal fit, making sure everything looks nice,
symmetrical, clean, evaluating the aesthetics of the porcelain itself. Assuming I'm happy with
that, I need the patient to look at it. And that's where the try and paste come in really handy
because that little bit of adhesion allows me to sit the patient up, hand them a mirror. I warn
them they have to be careful because they can knock these off. But it gives them a chance to look
at those in place because I'm not going to put them in until they tell me they love them. Do they
sign off on these things? Like literally sign off? Every single time. So they actually sign a
document or an iPad or something? Yeah. Yeah. Now, do you get the sign off? on the provisional at
that level too, or just on the try-in? I don't. It's not the worst idea,
but I do document in the chart the patient's response and critique of the temporaries.
I will document that in the chart. I do know some doctors.
They do make the patient sign off on the temporaries. I feel we have to sign off on too damn many
things. Yeah, no, I hear you. It gets to the point. I try to minimize it, but I do document that we
had the conversation. The patient said it was okay. Not the worst idea. Let me ask you this.
With your experience of doing, I don't know, thousands and thousands of veneers in your career, who
knows, how close is that provisional to the final delivery?
veneers where if the patient is fully pleased with the provisional, what are the odds that they
wouldn't like the try-in? Yeah. Typically, the only hiccup I'll ever get is shade,
contour, fit, occlusion, all of that. We're going to nail that in the temporary. Right. Because
shade on the provisional side, you're limited to whatever that goop comes in. Right. Where you have
much more control when you're doing with laboratory work. Right. Okay. I see. Yeah,
on the rare occasion where they do not approve at the try-in stage, I'd say 90,
95% of the time, it's because of shade. You mentioned on your webinar that you like to use
transparent try-in paste. Yeah. And also transparent cement.
Tell us about that. I want the color to come from the porcelain. If you're trying to alter color
using your cement, what happens is the depth of color starts to disappear.
So your porcelain veneer is thin enough that it's picking up the shade of the tooth that's behind
it. Okay, light goes through the porcelain, hits the natural tooth,
and that is reflected and refracted back. You change the color with the cement,
now light goes through the porcelain, it hits the wall. Okay, so you don't get that depth of color
if you're altering. shades with the color of your cement. Okay,
so let's say you did a try-in on me and you've got six veneers in there and I don't think the
value was high enough. I want it brighter. What do you do? I will take the try and paste and
whether it's the bleach shade or the white shade or the opaque shade, I will try it in again,
altering the shade with the try and paste and see if I can get you to where you want to be.
So I'm definitely going to take a look at that. And if that little bit of change, because you're
not going to get a lot of change. Okay. But if that little bit of change is what takes you from, I
kind of like it to that's what I want. Great. We go from there. So then you'll use the same shade
cement that exactly matches the try and paste. Yeah. Yeah. And the system's designed so that the
try and paste and the cement. So it seems to me that every time you start,
you should start with the transparent try and paste. Every time. Okay.
And then play around with the colors if you can micro-optimize it a little bit and get the patient
to be satisfied. Great. And if you can't, what do you do? Back to the lab. Photographs and send
them back. Send them back to the lab. Yeah. And how often does that happen typically? We have a lot
of young dentists that are on this. So how often should they expect that to happen realistically?
If you're communicating well with the patient in the very beginning, and communicating well with
your ceramics, 10%, 15%. You jinxed me by asking me these questions,
Phil. That's going to happen to me tomorrow. It's rare. Because the reason why I'm asking is
because the provisional is not, the provisional is a completely different material and the lab
doesn't know anything about it. It comes out of a box. and you buy it in bulk, whatever. So you're
getting a shade range for that patient. But when that thing comes back from the lab, that's based
on your discussions, you working with the lab and what they're looking for. But I think more than
anything, when that thing is delivered, it's going to be so beautiful. I don't think the patient's
going to want to send it back and have to start all over again if it's close. Yeah. Well, the
aesthetics of going from porcelain to composite resin, Biscocryl temporaries,
that change is so dramatic that the patient's immediately going to notice the depth of color,
the transition of color, the separation because they're not connected in the final veneers.
Yeah, I mean, usually the initial response is more likely. I like the temporary.
I love these. Rarely do I get, I like my temporaries better. Right. Now let me ask you about
materials. You know, zirconia is a hot material right now. And you could make veneers, what,
0.3, 0.5 millimeters thin. I don't even want to say 0.5 millimeters thick.
I'm saying 0.5 millimeters thin. But, you know, typically we're still using lithium disilicate,
right? And there's two different ways of... these materials when you're bonding them in or you're
cementing them in. Which material do you use primarily? I would assume it's lithium disilicate?
Exclusively. Okay, so you don't see a reason to use zirconia at this point? No,
I use a lot of zirconia, but never as a veneer. It doesn't have the translucency? Depth of color,
translucency. Bondability too. I'm still not convinced. And maybe it's just me being old.
I don't want to keep up on the literature, but I trust lithium disilicate to bond to the tooth.
Right. And if you don't need the strength that zirconia is providing and you do have the confidence
issue and the uncertainties, like you're saying, why bother with it for veneers? Yep.
Yeah. I'm also old enough. I don't like dealing with failure. Yeah. I am with you 100% on that.
Risk avoidance. Yes. Yes. Risk averse is exactly the word. All right.
So let's talk about cement selection. So when we're preparing the tooth for veneers, we're not
relying on mechanical retention. That's just the nature of the veneer prep. So we certainly need to
get some bond strength. Now, self-adhesive or self-etched self-adhesive cements don't provide us
with that kind of bond strength. So what are we looking at? What should we be using? Yeah. Yeah.
And even on all the self-etched cements, it doesn't matter who makes them. If you look at the the
indications for use, all of them in that document will say contraindicated for veneers.
So what it means is the bond strength of the self-adhesive, self-edged self-adhesive cement is
just not there yet. And there's no reason to use them. So if you would share with us your clinical
technique on cementing in your veneers, preparation of both the actual lithium disilicate,
the intaglial surface, and also the tooth structure. Yeah. Take the veneer off. Rinse it out, air,
water, spray. I don't need to re-etch it. It's already been etched in the lab, but I do need to
clean it because it's been contaminated in the mouth. Saliva, blood, you know, whatever. So I'm
going to clean it.
Bisco makes a product called Zirclean, designed for zirconia, but it will work on lithium
disilicate. Ivoclar makes Ivoclean, specifically made to clean lithium disilicate.
But I'm going to clean the internal aspect of that veneer that's been contaminated in the mouth.
And then I'm going to silonate that veneer. I'm actually re-silonating it because it was silonated
in the lab. But I'm going to do it again. Can't hurt, might help. Then that's sitting over here
being done. While I'm doing that, my dental assistant is going to rinse the prepared teeth and then
take a profi cup. with pumice and she's going to clean those prepared teeth again.
And then one of the things I, I trained them to look for is if we had an area that was bleeding,
be sure it's not bleeding now. So I'm going to go back to the hemostatic agent because we've been
in there manipulating and all that. So you use a hemostatic agent at that point? Yeah.
Yep. I don't want to drop a blood on those teeth. I don't want any contamination at all. So we
clean and prepare, the porcelain we clean and prepare the prep and the soft tissue and now i'm
ready to go to cement but you haven't you haven't put your adhesives uh bonding agent yet on the
tooth no okay okay so those two things are going on behind the patient or while the dental system's
working on the patient i'm preparing the porcelain now we're going to isolate the area um could use
a rubber dam honestly and I've been doing this long enough that if I have a patient who's well
-behaved, listens to instructions, I can do this with orthodontic retractors. So I'm going to
isolate the area, rubber dam, orthodontic retractors, whatever, isolate the area. I'm going to
deliver all the veneers at the same time. So next step is etch all the prepared teeth.
20 seconds, 30 seconds. Rinse, dry. Now I'm going to place my universal bonding agent on all the
teeth. Okay, a good 20, 30, 40 seconds putting that on all the teeth. Then I'm going to
aggressively air dry that. And I want to light cure each tooth about 10 seconds is good.
Okay, while my assistant is light curing those, I'm starting to load the veneers with the cement.
And I'm going to start with the two centrals, get those into place. Then she'll take over and start
loading and handing them to me. Give me the lateral. Give me the lateral. Give me the canine. Give
me the canine premolar for going back that far. I'm going to get them all into place. Now,
I've put those in place fairly quickly. I've got time to evaluate the seat.
Clean off the excess cement. Go back and reevaluate. Make sure I have them in the right place.
Clean off a little bit more cement. Go back to the centrals. Look at the centrals. Make sure
they're exactly where I want them. I'm going to hold them in place. And right on top of the
papilla, I'm going to have my assistant light care for 10 seconds. And then I move over central
lateral. Check it, look at it, clean off more cement, hold it to place. Light care that for 10
seconds. Go to the other central lateral. Same thing. And I repeat it back and forth.
And I'm just tacking it into place to stabilize the veneer for me to move to the next veneer.
So we go back, forth, back, forth. Now, once I've got them all in there, now each tooth,
30 seconds, 30 seconds, 30 seconds from the lingual, 30 seconds, 30 seconds, 30 seconds.
Then we remove everything, let the patient relax for a little bit. And now we have to clean things
up. Yeah. And before we get to cleaning up, I want to just mention that you used etch on the tooth
before the universal adhesive. Now, you basically apply this etch to the entire surface of the
tooth. Because it's all enamel. I just wanted to clear that up because if you were doing a
restoration where there was dentin, you probably would have used a selective etch and then you used
the universal bonding agent because you don't want to have phosphoric acid on dentin followed by a
universal adhesive. But that wasn't the issue here because we're doing veneers and it's all enamel.
Yeah, there may be a little bit of exposed dentin here and there, but... You weren't worried about
it. No, no. But the demonstrated bond strength to etch enamel is so good.
Yeah, no doubt. Self-etch, you could probably do a self-etched bonding agent without,
but why would you? Yeah. To save a few seconds? Right. Yeah, no, absolutely.
In fact, that's what's so successful about using a universal bonding agent with a self.
etching technique is because you do put the phosphoric acid on the enamel and you don't put any
etch on the dentin. And the universal adhesive takes care of that self-etching dentin in a more
gentler way. And then, of course, you get very powerful bonding to the enamel. Right.
And you've cured fully at this point? Fully. Okay. Fully. Yeah. Now what? Now we're getting a
little bit of excess cement. So... I start with a 12 fluted carbide.
You'll have more. excess cement on the lingual side. So I get a football shaped carbide and I go to
the lingual with my mirror and I start looking for cement and cleaning it off. Once I've got all
that cleaned off, now I go to the facial. 12 or 16 fluted carbide all around each margin.
Getting rid of that. On top of the papilla is where most of the excess cement will be. Number 12
scalpel blade and just carve in there and you can get in a little bit further and safer on top of
the papilla. Get rid of that excess cement. And then the last thing I have to do is separate the
teeth because they're still probably connected together. I'm not going to be able to floss in
between. And that's where I use something called a series saw that DenMap makes.
It's a little metal blade. It's got teeth on the end. It's serrated.
It's attached to a little mini hacksaw blade. If you've seen a plumber's hacksaw,
it looks like that, just this big. And I take that and I'll be able to separate in between every
interproximal area. And you don't open up any contacts doing that? No, the teeth will flex on the
periodontal ligament. So just like when you put a wooden wedge in between your matrix band, when
you're doing a class two, same thing. There's a little bit of flex built into the tooth. So as you
go down with that blade, the tooth will flex a little bit. As it flexes, it separates. The blade
will go through. You don't create a diastema. Everybody worries about that until they do it.
Right, because the cement is actually probably pushing the teeth apart a little bit anyway. And
when you remove it, it's just snapping back. Yep, it comes back. Now, I know you use a light cured
cement and you have your opinion on using a dual cure cement for veneers.
Tell us about that. Two things to worry about. Two things to worry about.
One, is with a dual cure, once your catalyst and base are mixed, now you're on the clock.
And when you're trying to cement multiple veneers like I do, you're going to run out of time. Now,
depending on the light conditions in your operatory, you might have three and a half minutes, you
might have five and a half, six minutes. And I could probably do it with a dual cure because I've
just done a lot of them. But, you know, if one veneer doesn't quite seat a place and now I'm
fighting it or put more cement in it and trying to get back, I don't have any room for error. So I
don't like the dual cure because of being on the clock. Now with light cure, you're still on the
clock. The ambient light will eventually set it, but I've got more time. Okay, the other thing I
think you might be getting to with dual cure is shade shifting. Right, it gets darker. There's a
concern with dual cures that all the manufacturers have been working on fighting, and some of them
say they've figured it out. But dual cures have a bad reputation of shade shift over time.
Meaning as time goes on and the cement ages, it gets darker.
And it used to be a lot worse years ago. Okay, we know what causes it.
We've addressed it. We, the manufacturer world, trying to eliminate it,
but I'm not convinced we've 100% eliminated it. So with the dual cure, you run the risk of that
cement getting a little darker over time. As the cement gets darker because your veneers are so
thin, that might show through your veneer. So I avoid that risk by just avoiding that category of
product. Could I use it? Yes. Will it work? Absolutely. But if I have a little more working time
and I don't have to worry about the potential of shade shifting over time, why not?
Why risk it? The only downside I could see, Phil, is inventory. Because I only use light cure for
veneers. I don't use it for anything else. So I have to carry a separate product right now to be
able to do that. That's the only reason. You know, if you're only doing two veneer cases a year and
you're using dual cure cements on everything else, okay. You know, I can see it. That's the only
reason I can see why to switch to dual cure. No, that's a great point. That's a great point. What
does your post-operative appointment look like? to ensure that these veneers are going to have
longevity. You're going to get predictable long-term success after they've been delivered. What
does that look like? I want to be in the veneers one to two weeks. I want to get used to them. My
primary concern is going to be occlusion. And when you've had a patient in the chair and my
delivery appointment for six, eight, 10 veneers is about two and a half, three, could be four
hours. By the time you get to check in the occlusion, They're tired. They're numb. They're starting
to get sore. They're sick of seeing me and hearing my voice. Bite, bite, bite. How's that feel?
Great. Get me out of here. Right? And they're numb. Their proprioception is not the same as when
they're not numb and they're not sore. So I want them back in a week or two, and I'm adamant about
it. That's just part of what you paid for. You don't come back for that appointment, there is no
guarantee on the work. Okay? So one to two weeks, what I'm looking for, one. Is the occlusion.
How's it feel? What are you bumping into? You know, how's your speech? You know, do you feel like
you're talking correctly? All those things. And I'm going to double check it. Okay. They're not
numb. Now they're going to be able to bite together normally. And I'm going to look for that and
find, is there an interference? Laterals are always what I see when they move into function and
they go into their lateral guidance. They're picking up the distal of a lateral. It's like, I don't
want that. I'm going to eliminate that. So I'm checking the occlusion. But the other thing is I'm
looking for excess cement because I know with my cementation technique that I'm probably going to
miss a little piece of cement over here or there, or when they're flossing, it's shredding right
here between the canine and the lateral. And I got to go back and get that little bit of excess
cement out. So for the soft tissue health, long term i've got to be sure gotten rid of all that
that's a critical critical endeavor right there yeah i mean and you'll probably see some reddening
of the gingiva if there is excess cement or they'll be by two weeks they'll be complaining that
they're a little uncomfortable right in certain areas yeah well they're going to say every time i
floss here it bleeds right or or it tears the floss yeah yep yep and i get right back in there and
you find just this tiny little bit of cement Yeah, it's hard for radiographs to pick that up,
isn't it? You can't really get that on a radiograph. Yeah, you're going to see a red papilla or
you're going to see a bleed when you floss it or they're going to tell you the floss shreds.
You'll pick it up really fast. Yeah, yeah. No, fantastic stuff. Again, Dr. Radz,
we really appreciate you talking to us. You've been, you know, as long as I've been in this
profession, your name has been kind of a household name when it comes to key opinion leaders and
lecturers. lecture to just about everywhere but what makes this so fascinating this form of media
is that we could have this conversation and you can reach for this episode alone tens of thousands
of people and it's a very powerful thing especially for someone that has the kind of experience you
have it's invaluable and all over the world they come from all over the world to hear it yeah no
it's impressive what you guys yeah well it's it's as i always say it's i'm the guy asking the
questions it's it's who we're talking to that matters i could only talk about endo for so long um
all right dr rads uh hopefully we'll have you on again soon enjoy colorado and it's been a great
conversation we really appreciate your time yeah it's always good talking to you phil i appreciate
it
 Episode 793. Mastering Porcelain Veneers: From Digital Wax-Up to Post-Insertion Visit
8/10/2026 - CE Credits: 0.5 CEU (Take Exam)
Episode 791. The Latest in Composite Dentistry: Universal Composites, Bonding & Clinical Pearls
8/3/2026 - CE Credits: 0.5 CEU (Take Exam)
Episode 736. Doing More with Less: Restoring the ‘Hopeless’ Tooth with Composite
1/19/2026 - CE Credits: 0.5 CEU (Take Exam)
Episode 726. The Power of Passion and a Great Mentor: A Young Dentist’s Rise to Fee-for-Service Success
12/8/2025 - CE Credits: 0.5 CEU (Take Exam)
Episode 723. Clear Aligners in General Dentistry: Opportunities and Challenges
11/24/2025 - CE Credits: 0.5 CEU (Take Exam)