The Rubber Dam Misconception

When you think of rubber dams, do one or more of the following thoughts immediately come to mind?
- Rubber dams are difficult
and time-consuming to place.
- Patients hate rubber dams
because they’re uncomfortable.
- Using rubber dams greatly
increases chair time.
- Rubber dams are bound to tear.
If these are the things you associate with rubber dams,
you’re a victim of the rubber dam misconception! The reality is, using rubber
dams can be simple and easy.
It’s time to change how you think about rubber dams
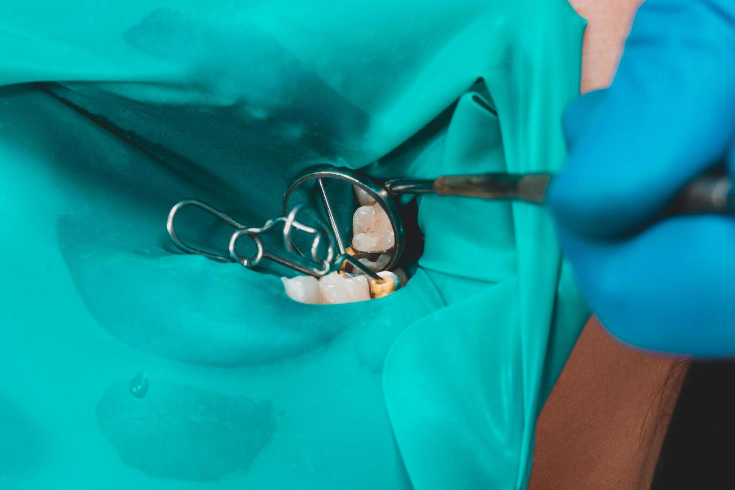
A properly placed rubber dam promotes a moisture-free, uncontaminated working environment…in other words, the high-quality procedure environment that you should be providing for your patients.
To get a little “schooling” in rubber dams we spoke with Dental Assistant Shannon Pace Brinker, Founder and Owner of the Academy of Chairside Assisting. Shannon is one of the most well-known dental assistants in the country and has taught over 60,000 dental assistants across the U.S. and Canada.
Shannon quickly debunked each of the rubber dam
misconceptions listed above.
Rubber dams are not difficult and time-consuming to place
Like most things, placing rubber dams is a matter of training and practice. Shannon recommends that doctors train their teams to place rubber dams, as this is something that the dental assistant should be able to do it.
“It probably takes me three to four minutes to place it,”
Shannon shares, “and the biggest obstacle is what clamp goes for what tooth.”
Patients need to understand why rubber dams are necessary
Shannon asserts that sometimes we just assume that the patient won’t be happy about the rubber dam. “But the patient doesn’t know better,” she points out. “In our practice it’s not really a choice. It just comes with the territory and is part of pretty much every procedure. It’s all in what we say.”
Explain to the patient that the rubber dam is there to
ensure they don’t swallow any pieces of the filling or old crown, to shield
them from foul tastes, and to provide the isolation necessary for the procedure
to be successful. This will help them understand that although the rubber dam
may be uncomfortable, the procedure could actually be more unpleasant without it!
Rubber dams can actually decrease overall chair time
Having a rubber dam in place can make the procedure go smoother. After all, when something drips into the patient’s mouth you often need to interrupt what you’re doing to suction or rinse the material out. “You know everything we use in dentistry tastes bad,” Shannon acknowledges. “And once you drop something, they want you to start suctioning or rinsing them right in a critical phase of delivery or prep.”
The rubber dam enables you to avoid these interruptions, as
well as the anxiety associated with worrying that these interruptions—and an
associated poor patient experience—will happen.
Not all rubber dams are created equal
While we have probably all experienced the frustration of having a rubber dam break, using the right dam with the right technique will greatly reduce the chances of this happening. Shannon highly recommends the new Carbon dam from Cranberry.
Shannon states that the Carbon dam is a strong, medium-gauge material that’s not too thick or too thin. It’s available in both latex and non-latex, in a kit that includes a key guide that shows exactly where the holes should be punched. Shannon loves the black color (it’s also available in a dark grey), because the black makes it very easy for your eye to go straight to the tooth. “It does have a nice scent to it,” she relates, “which is a great thing because we know anytime we’re taking off an old crown, it doesn’t smell too good.”
In addition, Shannon says, “A lot of times, it’s matte on
one side and then has a little bit of powder on the other. This one is the only
one out there that is matte on both sides. So the reflection isn’t there. The
doctor’s got loops on and then we’ve got the overhead light. When we’ve got
this reflection, it’s hard to look at it sometimes. And by having the matte
finish, we don’t have that bounce of light.”
Tips for successful rubber dam placement
For a fast and easy placement procedure, Shannon recommends the following:
· Have everything in one place. Preparation
is key. Have all the tools and materials you’ll need at your fingertips.
· Limit the variety of clamps that you use. You don’t need a lot of different clamps; Shannon keeps it simply by only using around five.
· Use a
quality rubber dam system. Try out
different rubber dam products and make sure they hold up to your
expectations. I use Cranberry Carbon
because it is a very high quality rubber dam system that is strong, ideal for
intraoral visibility and photography and super easy to work with.
· Ensure your team understands the different sizes on the dial of the punch. Have a guide for which is the right size for which teeth, since it’s not a “one size fits all” item.
· Bring the rubber dam all the way to the
midline. Do not just isolate two or three teeth.
Conclusion
If you or your team members would benefit from further instruction on how to place rubber dams, you’ll want to watch Shannon’s 1 CEU webinar on the topic, available for free on-demand viewing


